ssh协议
- ssh客户端是一种使用Secure Shell(ssh)协议连接到运行了ssh服务端的远程服务器上的工具
- ssh是目前较可靠,专为远程登录会话和其他网络服务提供安全性的协议
- 有效防止远程管理过程中的信息泄漏
- 传输数据加密,能够防止DNS和IP欺骗
- 传输数据压缩,加快传输速度
- OpenSSH 是 SSH协议的免费开源实现。OpenSSH提供了服务端程序(openssh-server)和客户端工具(openssh-client)
- Mac和Linux中默认已安装ssh客户端,可直接在终端中使用ssh命令
- Windows需手动安装ssh客户端,较常用的Windows SSH客户端有PuTTY和XShell
- SSH能够提供两种安全验证的方法:
- 基于口令的验证—用账户和密码来验证登录
- 基于密钥的验证—需要在本地生成密钥对,然后把密钥对中的公钥上传至服务器,并与服务器中的公钥进行比较;该方式相较来说更安全
ssh客户端使用
- 下面的客户端指令均来自于linux版本的ssh客户端,
xshell和putty的使用方法并不一样
[root@node1 ~]# ssh root@192.168.175.147
# 登录远程ssh主机
[root@node1 ~]# ssh -p22 root@192.168.175.147
# 指定端口号登录远程主机
[root@node1 ~]# ssh -p22 root@192.168.175.147 ls -lha /etc
# 让远程主机执行指定命令
[root@node1 ~]# cat .ssh/known_hosts
# 查看已经链接过的主机
- 通过scp来远程管理文件
[root@node1 ~]# scp -P22 -r -p /root/file root@192.168.175.147:/tmp
# 将本地文件复制给远程主机,-r递归复制整个目录,-p保留源文件的时间和权限属性
[root@node1 ~]# scp -P22 -r -p root@192.168.175.147:/tmp/file /root/
# 将远程主机的文件复制到本地
- ssh自带的sftp功能
[root@node1 ~]# sftp -oPort=22 root@192.168.175.147
root@192.168.175.147's password:
Connected to 192.168.175.147.
sftp> put /etc/hosts /tmp
sftp> get /etc/hosts /root
# 使用sftp在两台主机之前互相传递文件
sshd配置文件
- sshd服务的配置信息保存在
/etc/ssh/sshd_config文件中。运维人员一般会把保存着最主要配置信息的文件称为主配置文件,而配置文件中有许多以井号开头的注释行,要想让这些配置参数生效,需要在修改参数后再去掉前面的井号 - sshd服务配置文件中包含的参数以及作用
| 参数 | 作用 |
|---|---|
| Port 22 | 默认的sshd服务端口 |
| ListenAddress 0.0.0.0 | 设定sshd服务器监听的IP地址 |
| Protocol 2 | SSH协议的版本号 |
| HostKey /etc/ssh/ssh_host_key | SSH协议版本为1时,DES私钥存放的位置 |
| HostKey /etc/ssh/ssh_host_rsa_key | SSH协议版本为2时,RSA私钥存放的位置 |
| HostKey /etc/ssh/ssh_host_dsa_key | SSH协议版本为2时,DSA私钥存放的位置 |
| PermitRootLogin yes | 设定是否允许root管理员直接登录 |
| StrictModes yes | 当远程用户的私钥改变时直接拒绝连接 |
| MaxAuthTries 6 | 最大密码尝试次数 |
| MaxSessions 10 | 最大终端数 |
| PasswordAuthentication yes | 是否允许密码验证 |
| PermitEmptyPasswords no | 是否允许空密码登录(很不安全) |
安全密钥验证
- 在客户端主机中生成“密钥对”
[root@localhost ~]# ssh-keygen
Generating public/private rsa key pair.
Enter file in which to save the key (/root/.ssh/id_rsa):
Created directory '/root/.ssh'.
Enter passphrase (empty for no passphrase):
Enter same passphrase again:
Your identification has been saved in /root/.ssh/id_rsa.
Your public key has been saved in /root/.ssh/id_rsa.pub.
The key fingerprint is:
SHA256:9+KE/GYBG6wjbCQ4o9j139nD9kkrL29bdAYd49kTvLo root@localhost.localdomain
The key's randomart image is:
+---[RSA 2048]----+
|              .+ |
|              .o*|
| .     .      .++|
|+ . o   +      o.|
|o+ = . .S+.   . +|
|o . + +..o.. . o.|
|   . . oo.o=. o .|
|        .+=.BE.+ |
|         oo. OB. |
+----[SHA256]-----+
- 把客户端主机中生成的公钥文件传送至远程主机
[root@localhost ~]# ssh-copy-id 192.168.91.128
/usr/bin/ssh-copy-id: INFO: Source of key(s) to be installed: "/root/.ssh/id_rsa.pub"
The authenticity of host '192.168.91.128 (192.168.91.128)' can't be established.
ECDSA key fingerprint is SHA256:PWPGI+gebAxdFtOfQe66cO/RnTBEV/Qw5AEoZv6w5lM.
ECDSA key fingerprint is MD5:61:3d:ae:39:43:65:70:f4:9a:10:ff:48:67:6f:ef:54.
Are you sure you want to continue connecting (yes/no)? yes
/usr/bin/ssh-copy-id: INFO: attempting to log in with the new key(s), to filter out any that are already installed
/usr/bin/ssh-copy-id: INFO: 1 key(s) remain to be installed -- if you are prompted now it is to install the new keys
root@192.168.91.128's password:
Number of key(s) added: 1
Now try logging into the machine, with:   "ssh '192.168.91.128'"
and check to make sure that only the key(s) you wanted were added.
- 对远程主机进行设置,使其只允许密钥验证,拒绝传统的口令验证方式。记得在修改配置文件后保存并重启sshd服务程序
[root@localhost ~]# vim /etc/ssh/sshd_config
..................
65 PasswordAuthentication no
PubkeyAuthentication yes
...................
[root@localhost ~]# systemctl restart sshd
- 在客户端尝试登录到服务器,此时无须输入密码也可成功登录
[root@localhost ~]# ssh 192.168.91.128
Last login: Fri Apr 19 17:12:37 2019 from 192.168.91.1
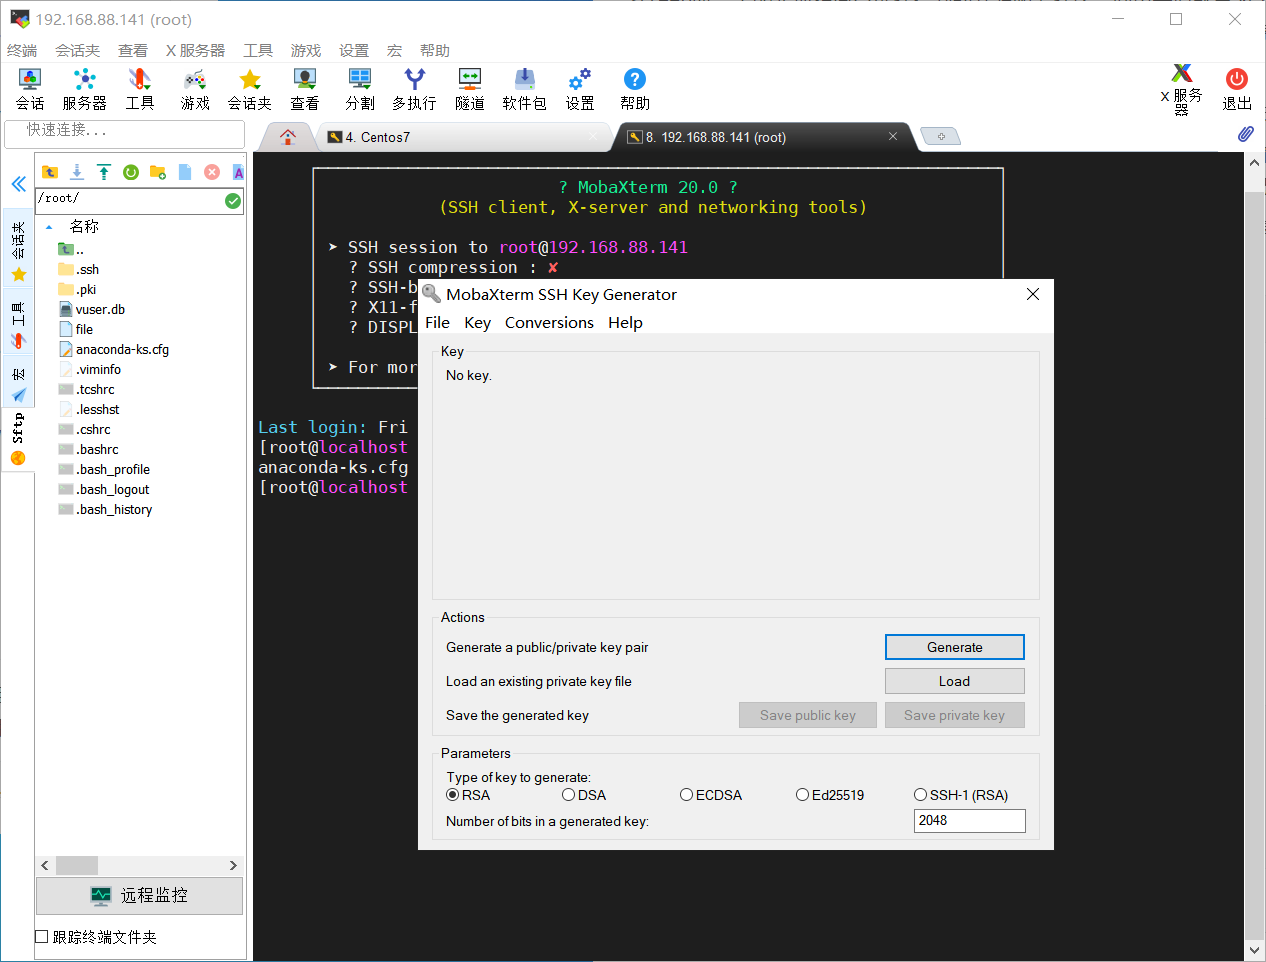
mobaxterm使用密钥登录
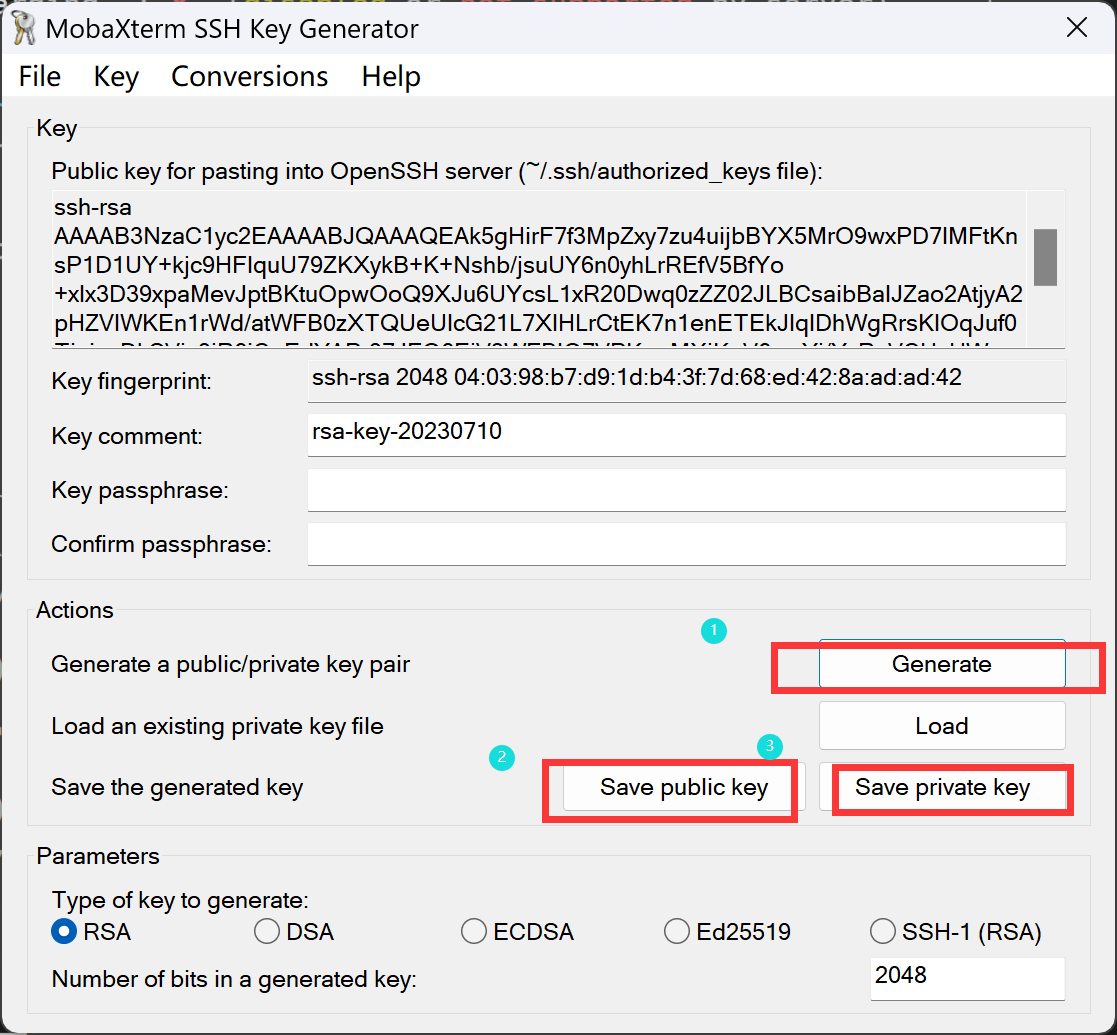
一、生成密钥

二、分别保存公私钥对

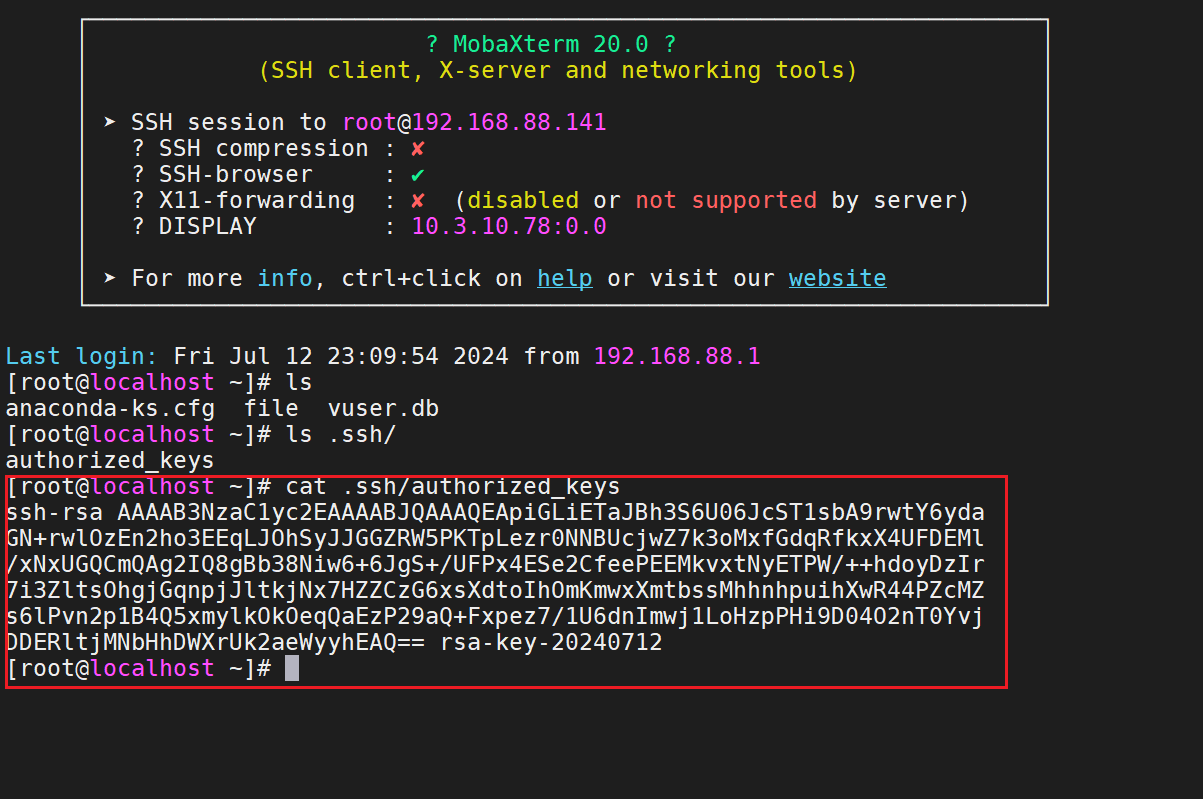
三、linux .ssh目录下新建文件,将上面生成的密钥粘进去
